W80X Arduino 按键控制 LED
发布于 2023-07-14 12: 02: 36
在这个例子中, 我们将学习如何用按键控制 led 灯.
必需品
- 1 x 面包板
- 1 x 按钮 (如果没有按钮, 也可以使用开发板上的 BOOT 键作为按钮实现)
- 1 x LED
- 1 × 330Ω电阻
- 2 x 跳线
接线图
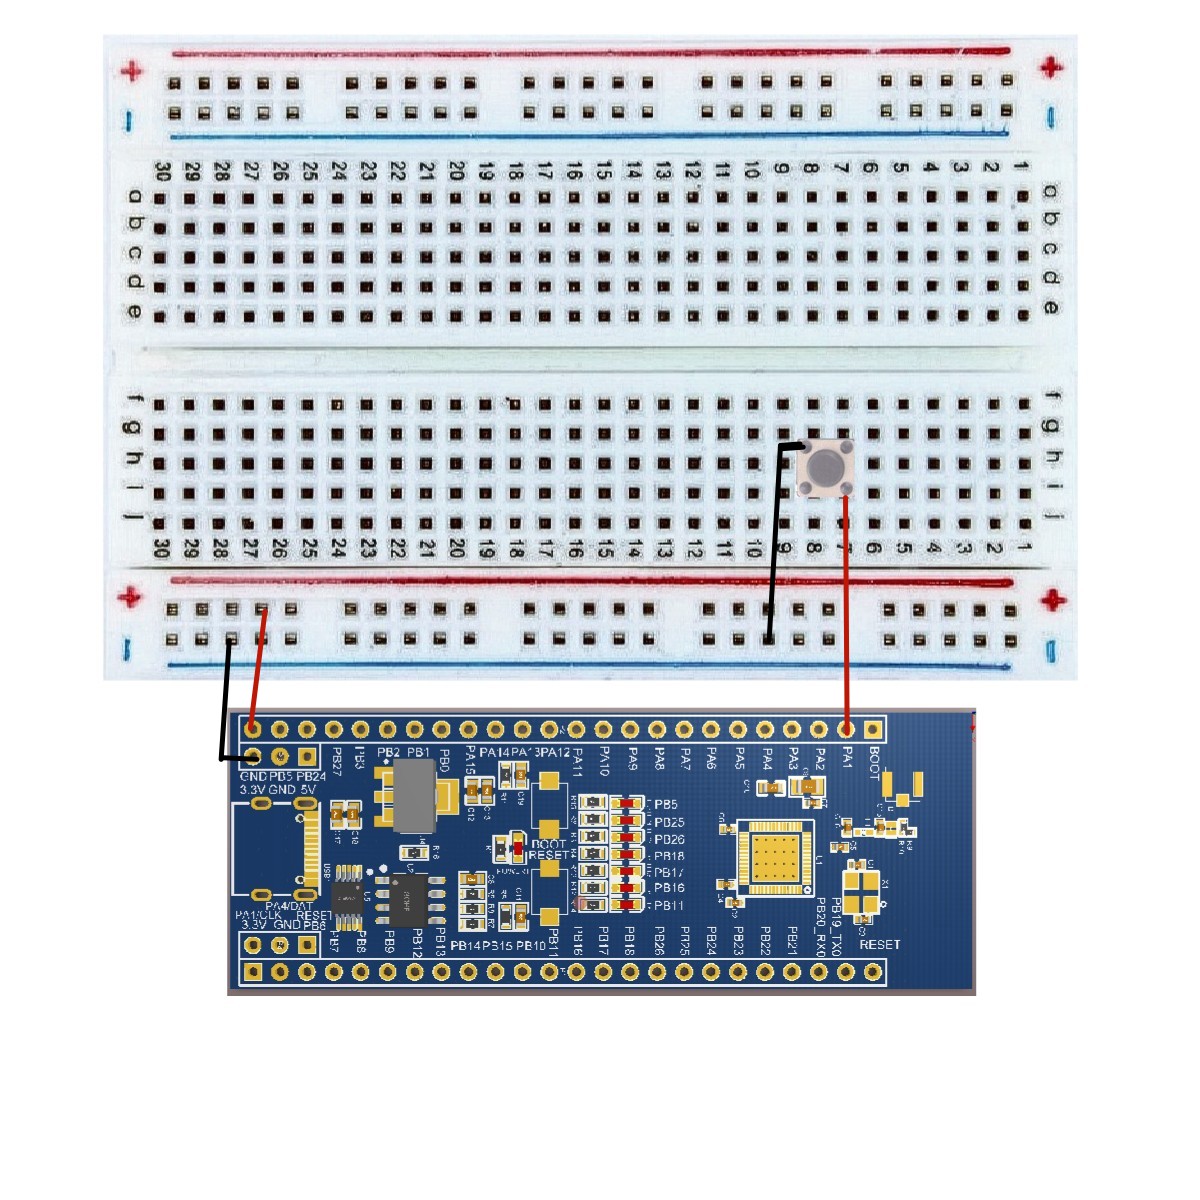
根据电路图连接面包板上的元件, 如下图所示.
草图
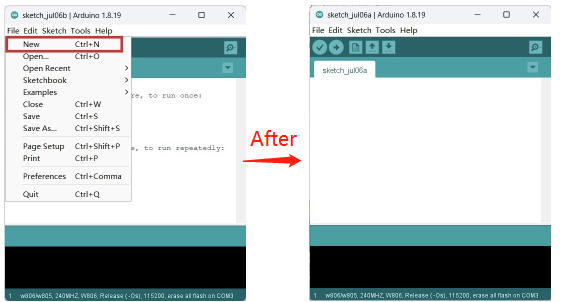
在计算机上打开 Arduino IDE 软件. 使用 Arduino 语言对电路进行编码和控制. 点击 "新建" 打开新建草图文件. 这里不讨论具体的配置.
代码
/*
  Button
  Turns on and off a light emitting diode (LED)  connected to digital pin PB5,
  when pressing a pushbutton attached to pin PA1.
  Note:  on most Arduinos there are already seven LEDs on the board attached to pin PB5, PB25, PB26, PB18, PB17, PB16, PB11.
*/

// constants won't change.  They're used here to set pin numbers:
const int buttonPin = PA1;      // the number of the pushbutton pin.
const int ledPin =  PB5;       // the number of the LED pin.

// variables will change.
int buttonState = 0;   // variable for reading the pushbutton status.

void setup ()
{
  // initialize the LED pin as an output.
  pinMode (ledPin,  OUTPUT) ;
  // initialize the pushbutton pin as an input.
  pinMode (buttonPin,  INPUT) ;
}

void loop ()
{
  // read the state of the pushbutton value.
  buttonState = digitalRead (buttonPin) ;
  // check if the pushbutton is pressed.  If it is,  the buttonState is HIGH.
  if  (buttonState == HIGH)
  {
    // turn LED off:
    digitalWrite (ledPin,  HIGH) ;
  }
  else
  {
    // turn LED on:
    digitalWrite (ledPin,  LOW) ;
  }
}
代码导入步骤
首先单击 Verify 验证代码是否正确

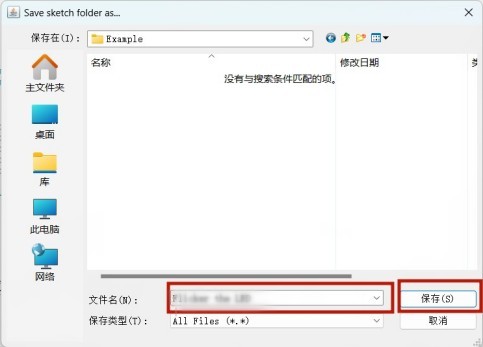
接着单击 Upload 上传代码弹出保存框, 在相应的位置编辑文件名并保存即可

也可以如下步骤
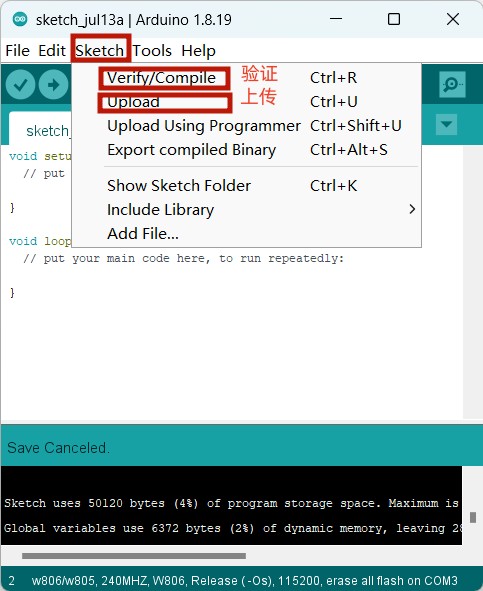
最后等待上传需要十几秒的时间, 显示以下即表示成功

代码解释
digitalRead (buttonPin) ;
digitalWrite (ledPin,  HIGH) ;
digitalRead (buttonPin) , digitalWrite (ledPin, LOW) -我们在这里使用的是数字信号. 如果你要使用模拟信号, 你必须使用内置的 "函数" analogRead () 和 "函数" analogWrite () 来做到这一点.
结果
当按下按钮时, 灯会高亮; 否则, 灯会熄灭.
1 条评论



In addition. . .
The easiest way to deal with the button bounce problem is to pause. We just stop and wait until the transient is complete. To do this, you can use the delay () or millis () function (for more information, you can refer to the article on using the delay () and millis () functions in arduino) . 10-50 milliseconds is a perfectly normal pause value for most cases.