Use CDS found W806 Procedure for single-machine commissioning
Obtain data
- Log in Flathead Brother Open community to download the latest version CDS "Flathead brother chip open community (OCC) (t-head. cn) " Recommended use CDS5. 2. 10 Version and above is best.
- Log in Link Shengde official website download W806 the SDK The current version is 0. 6. 0 edition, Download address is WinnerMicro Lianshengde Microelectronics
Software installation
- Ready to download CDS After the installation package is decompressed, Run as an administrator setup software, Follow the prompts to keep the default step by step.
SDK Library directory, Content introduction
- Got it from the official website SDK package, Unzip it to Will appear WM_SDK_W806 catalogue, Enter its directory, The contents of each folder are described as follows
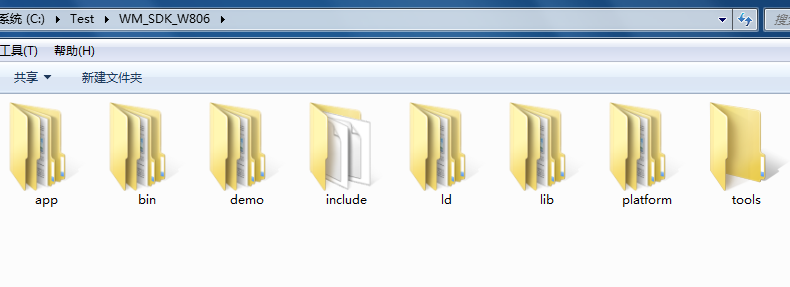
- app : The folder mainly stores the currently running user programs.
- bin : The folder is mainly stored The final generated serial port burning file.
- demo : The folder is mainly used by each peripheral demo routine, User is running a certain one demo Functional time, You can copy it directly to app Under the folder, Replace the corresponding file, Recompile and burn to verify
- include : The folder is mainly stored CPU Kernel-related header files and peripheral related header files.
- ld : The ones in the folder are for the renovation Linked file ,
- lib: Folder stored under the kernel related Static library file,
- platform: Under the folder is Platform related files, And library source code, etc
- tools: Folder under the main store of the generated final Tool for burning files, CDK Project management document, And some compile cache files and so on.
new W806 CDS template
In the last section, we have analyzed the official website SDK Have a basic understanding, In this section we will cover the official SDK Be based on, Make a CDS The new engineering template. Later development can directly copy the template for development, Shorten development cycle.
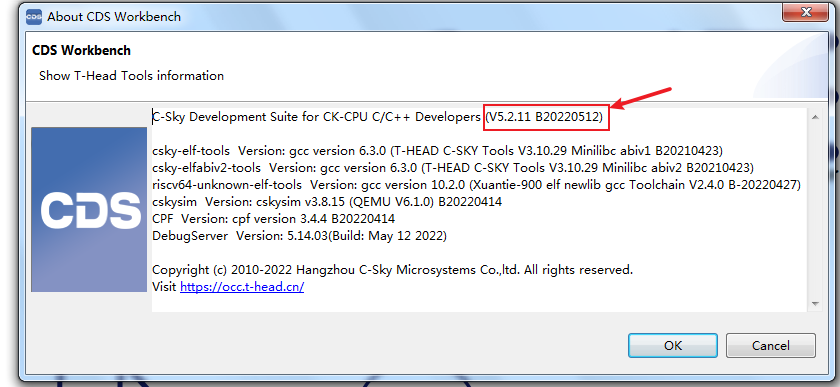
CDS Software version description : This time adopt CDS V5. 2. 11 B20220512 , It is recommended for your friends CDS edition 5. 2. 10 Or higher.
The version number can be from CDS Found it in the software "Help ---" About CDS WorkBench" Option is found
New construction
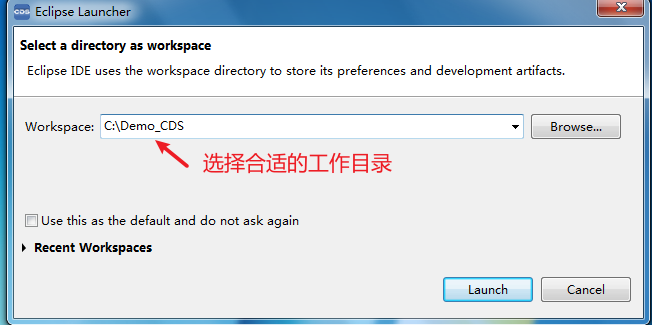
First opening CDS software, The interface shown below will appear, Click rightBrowse. . . Select work path, "It can be understood that this path is the path of the future project" In this demonstration project, I choose to C disc Demo_CDS Catalog as this demonstration project. Select and click Launch Button to enter software
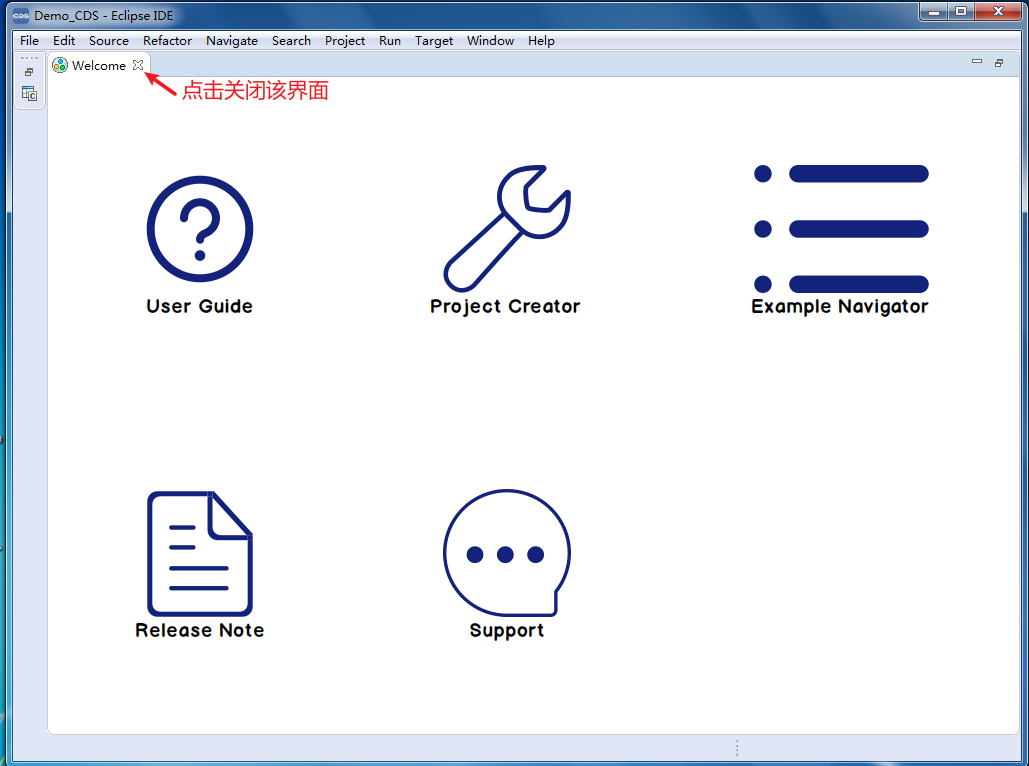
It is displayed after the software starts Welcome screen, The interface provides User manual , Project creation, demo routine isoshortcut, Interested partners can have a look, We'll turn it off this time.
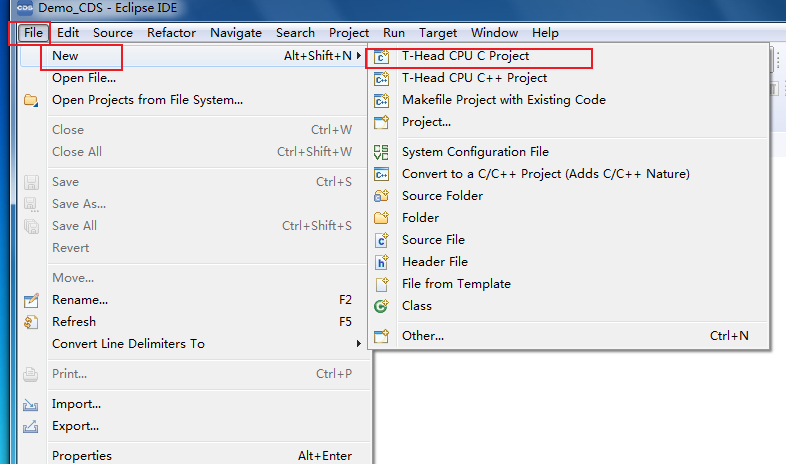
Creation project Click in turn Top left corner File ---" New --" T-head CPU C Project
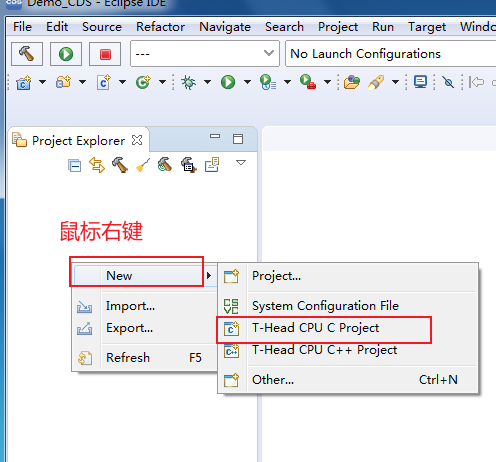
Or in Project Explorer bar Right mouse button create.
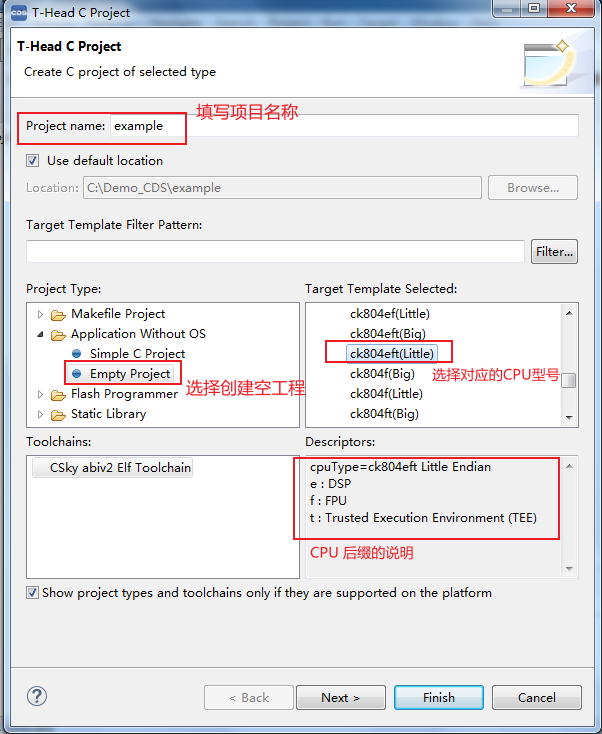
Fill in the project name, Select CPU Model number, And select the project type
- Project name: Fill in the name as required, This demonstration Use example
- Item type: This time from 0 Start creating, Select Application Without OS ---" Empty Project
- CPU Model number: According to the data book W806 CPU nucleateCK804eft It works in small-end mode, So we choose CK800 Series ---" ck804eft (Little)
Follow the above selection tap Finish Ready to create
Add the corresponding folder
Follow the steps above to create, Will be inProjectExplorer The name of the project you created appears in the TAB, Click to expand the empty item. Add corresponding folder groups to the new project, Used to distinguish platform-specific content, There are two ways to add a folder:
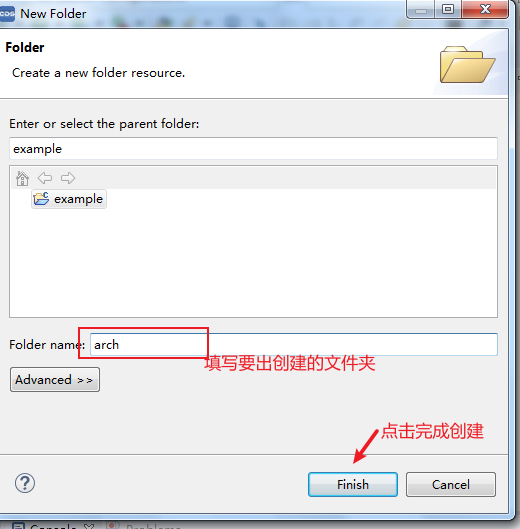
- in CDS New folder, Right buttonProjectExplorer TAB under the project name Click here , New ---" Folder In the dialog box that is displayed, enter the corresponding folder name.
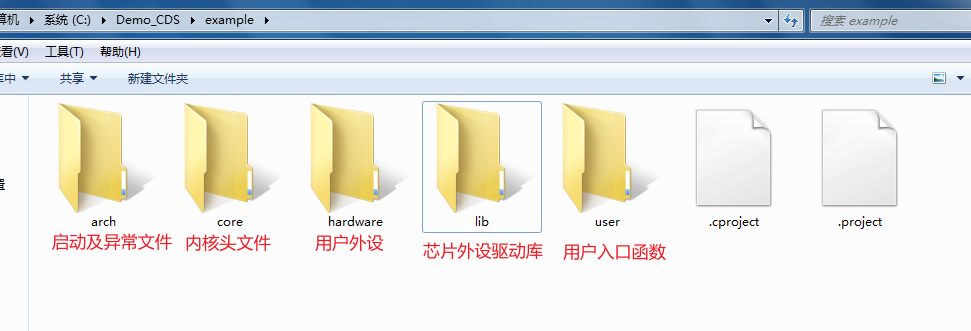
- The above method is not suitable for quickly creating multiple folders, We can go to the project directory, Create the corresponding folder in the project directory, Right-click the project name In this example, is example , Right-click on the menu barFile Explorer Quickly jump to the project directory.
Create the corresponding folder under the project folder as follows:
| Folder name | effect |
|---|---|
| arch | This folder stores startup files and exception handling files |
| core | CPU Kernel-related header files |
| hardware | Store user peripheral driver files, Temporarily empty |
| lib | Store source files and header files related to chip peripherals |
| user | Store the user's writing main. c Entry file |
Extract official SDK Medium file, Place it in the newly created folder
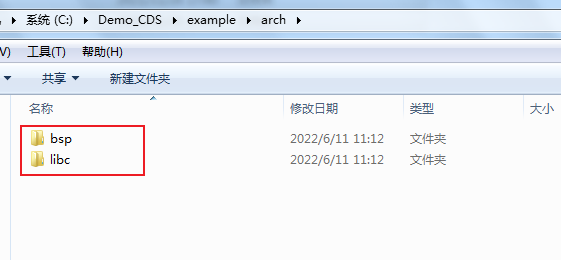
- will SDK In theplatform--" arch--" xt804 Two folders under the folder bsp and libc Copy folder to Newly created arch catalogue
- will SDK In theinclude subfolder wm_regs. h wm_type_def. h andinclude--" arch--" xt804 subfolder csi_config. h andinclude--" arch--" xt804--" csi_core subfolder core_804. h csi_core. h csi_gcc. h Copy the entire file to the newly created one core catalogue, The final documents are as follows:
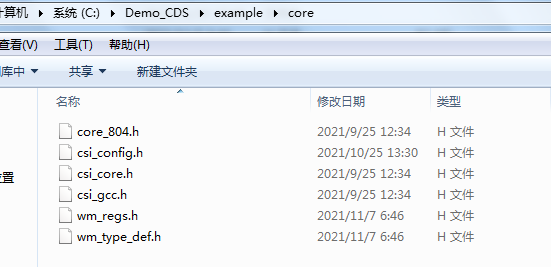
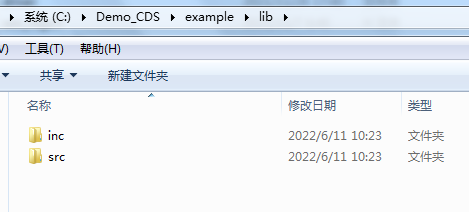
- In the new project lib The directory mainly stores peripherals related Header file and source file, Firstly in lib Under the directory inc and src catalogue
| name | effect |
|---|---|
| inc | Store peripheral-related header files |
| src | Store peripheral-related source files |
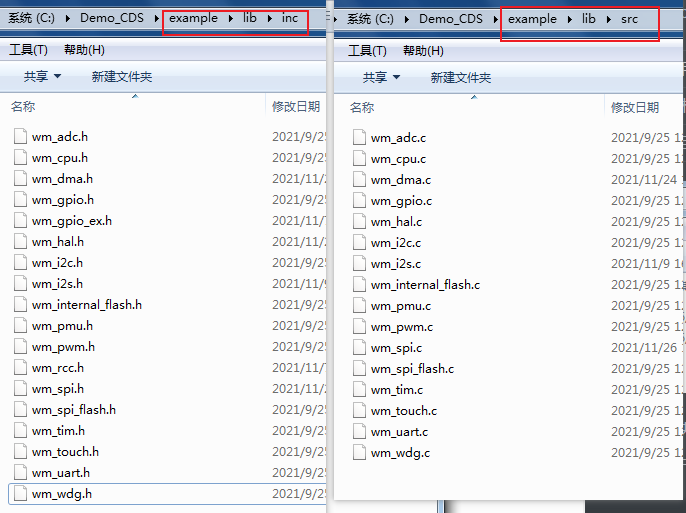
- will SDK In the include--" driver The entire header file in the directory is copied to inc file
- will SDK In theplatform--" drivers The whole source file in the directory is copied to src file
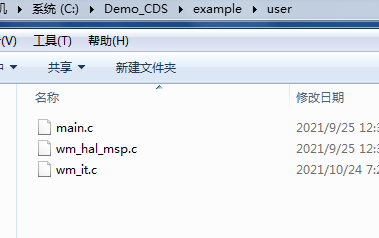
- in user Add under directory SDK In the app--" src File in the directory
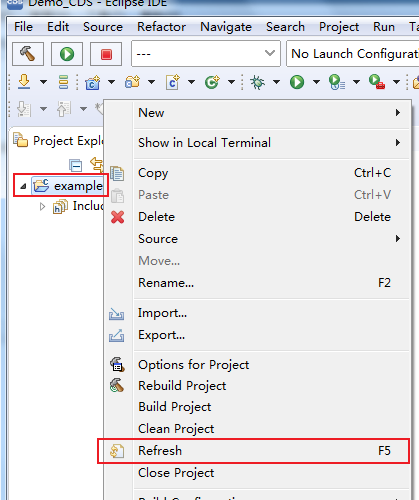
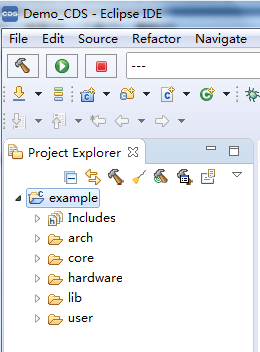
- Return after all the above steps are added CDS Software main interface, Right-click to select the project name Select Refresh Options to refresh, All the folders created will be displayed in the project.
Add the header file contain path
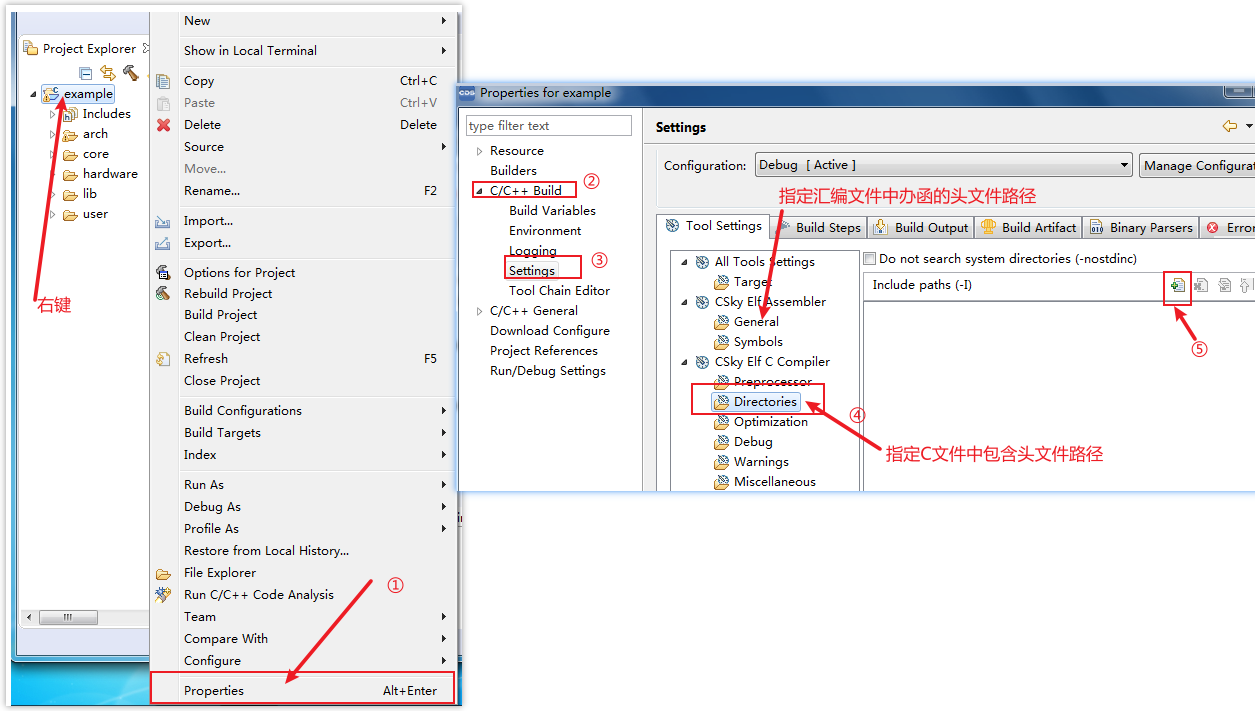
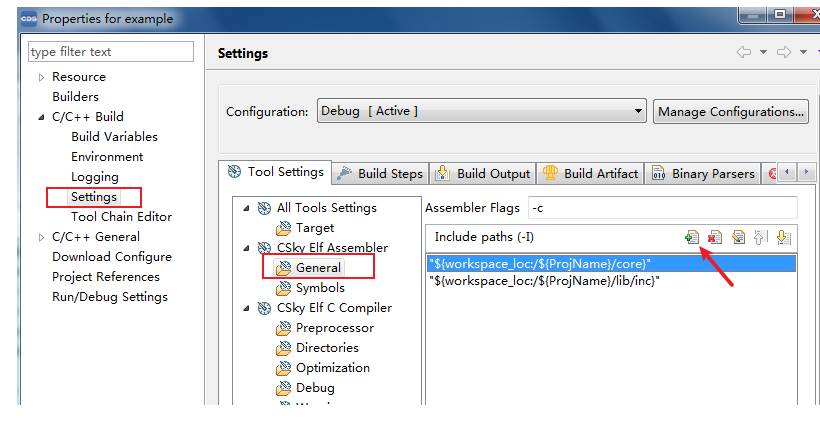
- Right-click project name , Select from the menu that is displayed Properties Options, Follow the options in the figure below Select, Add a directory containing the corresponding header file
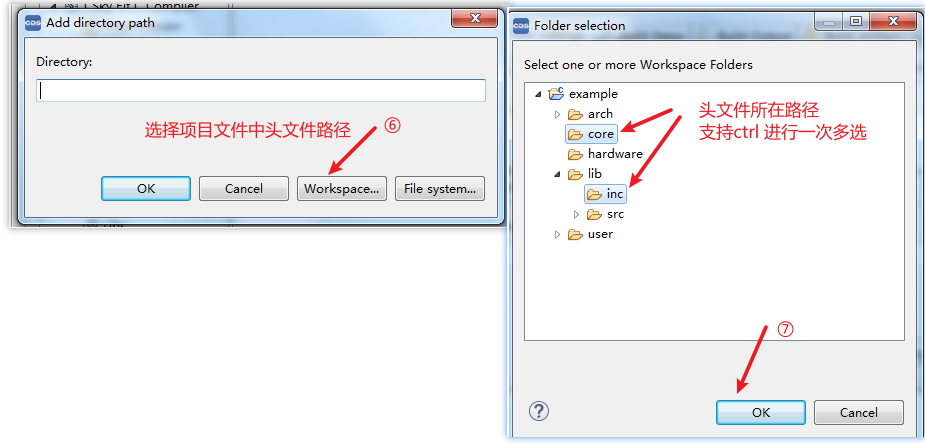
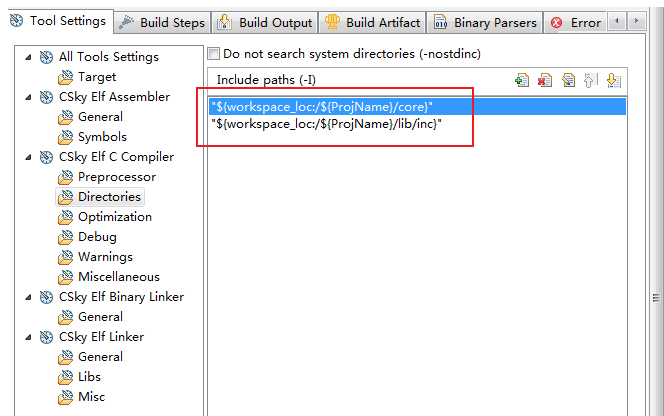
The assembly file is added to the corresponding header file path in a similar way, I won't repeat the instructions here
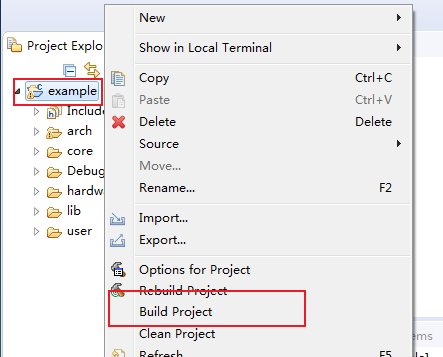
When everything is ready, Select Close TAB, Select Right-click item compile.
Compilation problem
- According to the above compilation completed Hou reported the following errors, Unable to generate elf document

The solution is as follows:
copy SDK In the ld subfolder gcc_csky. ld Folder to Project root.
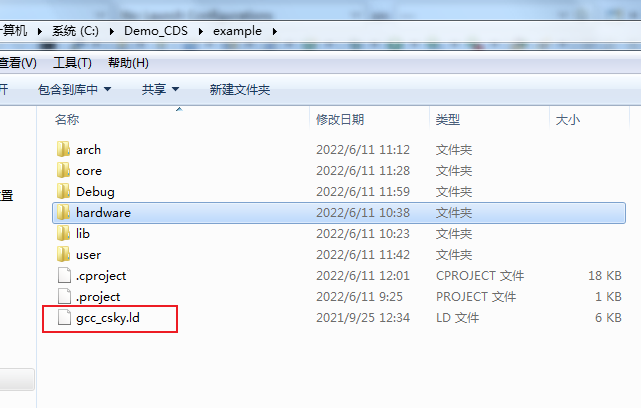
CDS The software changes the name of the link script as follows
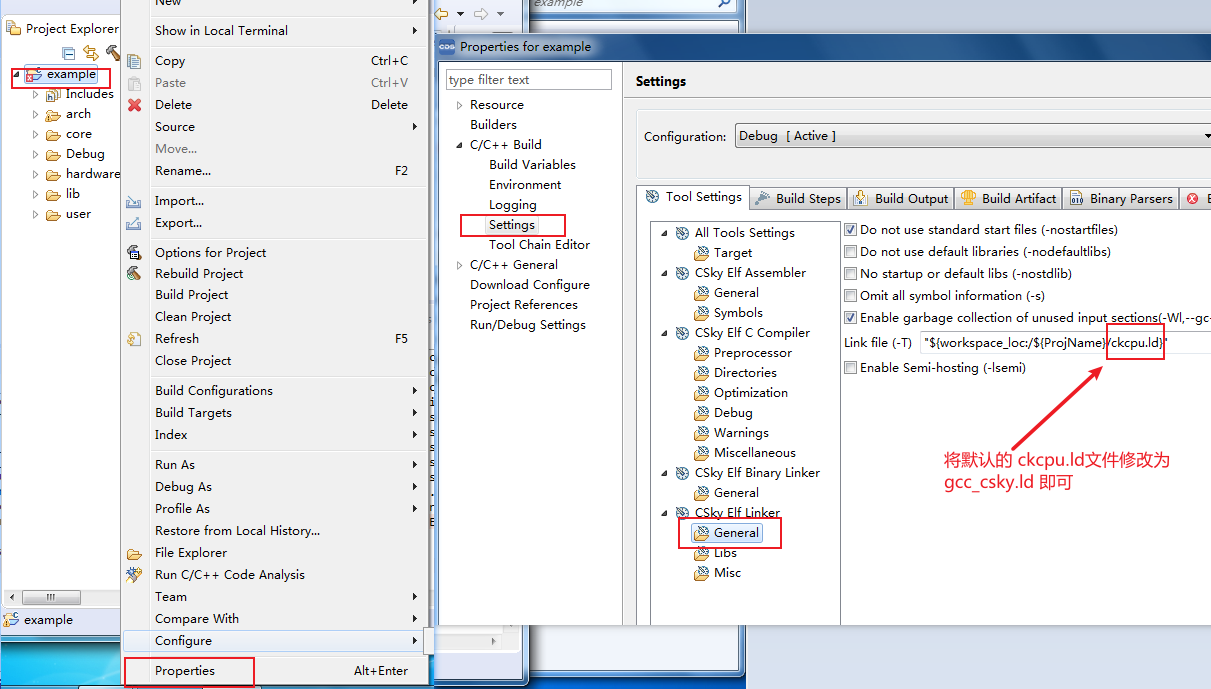
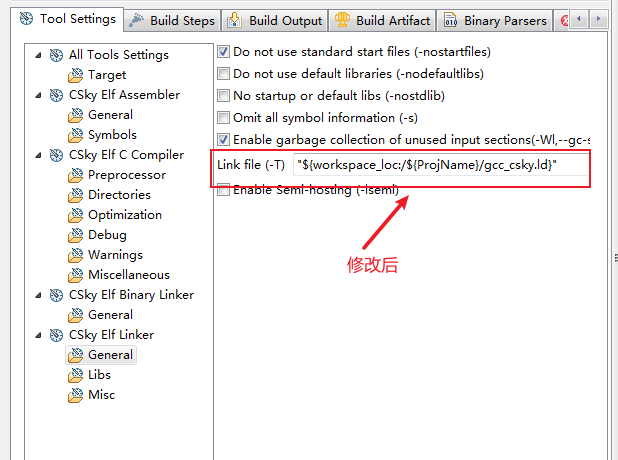
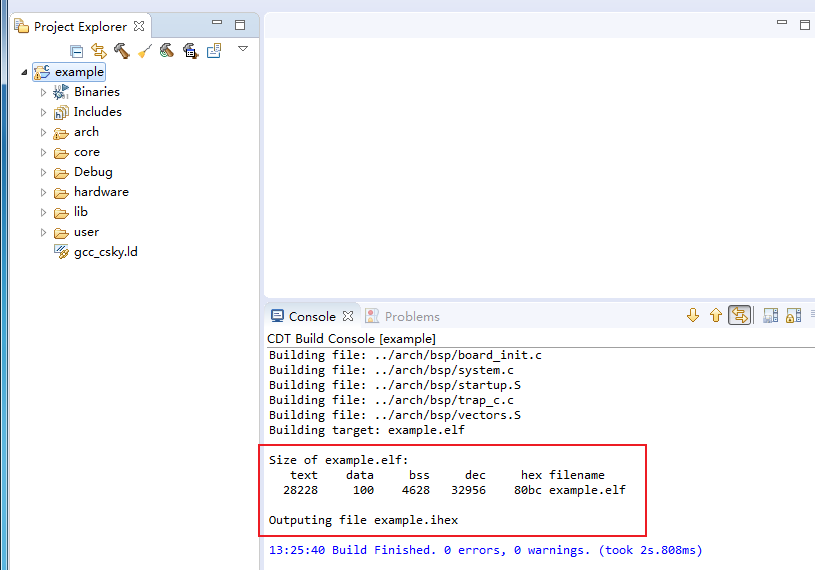
Modify and recompile, The project is created
