let W806 with STM32 As for real-time debugging download programs
This section will explain how to use it CDS + cklink Implement based on FLASH the debug Burn with
Preliminary preparation
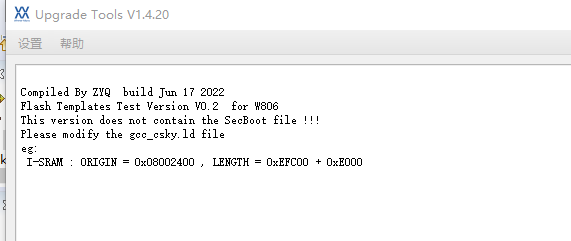
- Download the link provided below W806 the Flash Download algorithm file w806. flash, Due to Ali network disk sharing restrictions, So made 7z Format self-extracting exe document, Friends can rest assured to eat, Just extract it w806. flash document This algorithm file does not contain official secboot document, Therefore need edit gcc_csky. ld documentary flash Origin address
flash Algorithm chaining 「W806flash」https: //www. aliyundrive. com/s/qsFyBhTnpm2
The test project is also listed in the link.
- edit gcc_csky. ld document
This production flash The algorithm is not integrated official secboot document, Will be added later! ! !
-
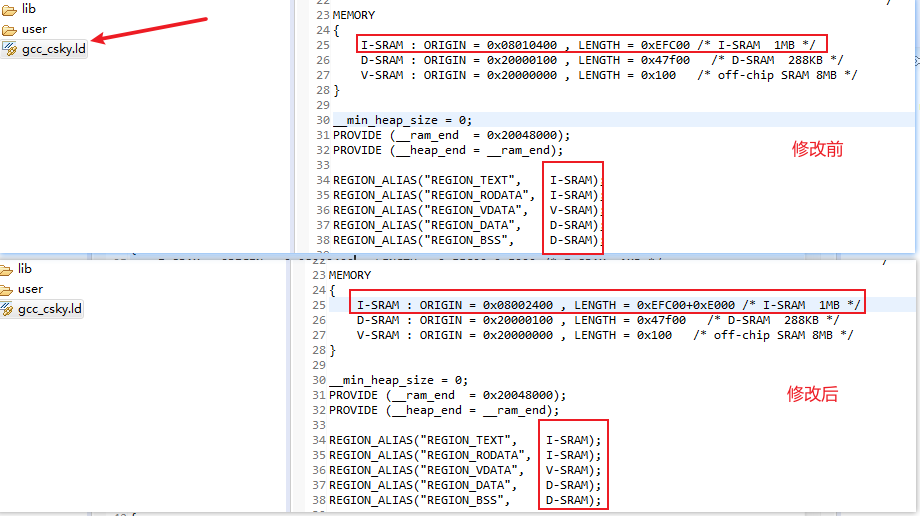
- Use CDS unpack Created project unpack gcc_csky. ld Modify the file as shown in the figure, Due to unintegrated secboot So we need to advance the program address, After the modification, recompile,
Hardware connection
- Use DuPont wire connection cklink and W806 , Its connecting pins are;
| CKLINK | W806 |
|---|---|
| TRST | RESET (PA0) |
| TMS | TMS (PA4) |
| TCK | TCK (PA1) |
| GND | GND |
- Use here W806 Development board external power supply, No longer use cklink Power supply, The commissioning may fail due to insufficient power supply.
- On account of W806 the PA1 PA4 lead, There are other additional features, Make sure when debugging, These two pins do not reuse other functions.
unpack T-Head DebugServer
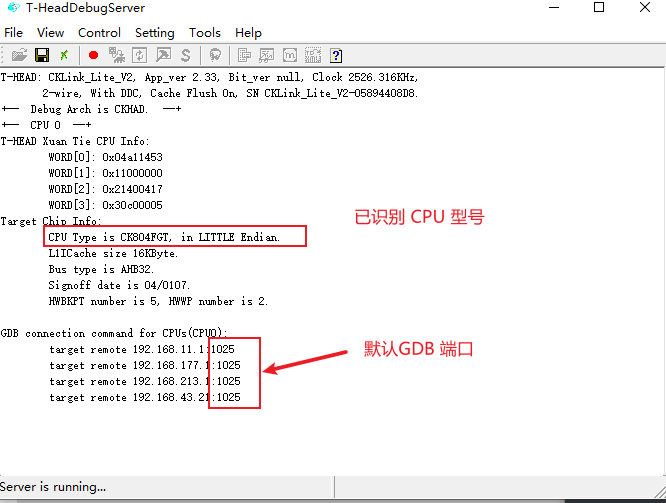
Double-click on desktop T-Head DebugServer icon, If the connection is normal, the following picture is displayed
To lead into flash Download algorithm
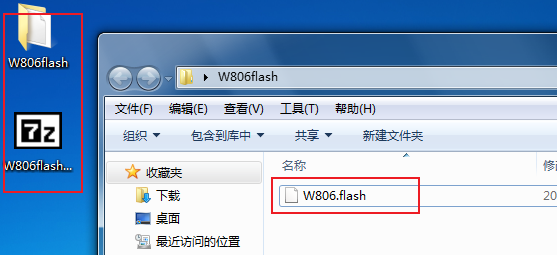
- unzipped W806flash. exe document, Will get W806flash file, The algorithm file is downloaded in the folder W806. flash
- unpack CDS ENGINEERING, Click the toolbar options at the top of the software Window --" " Preferences
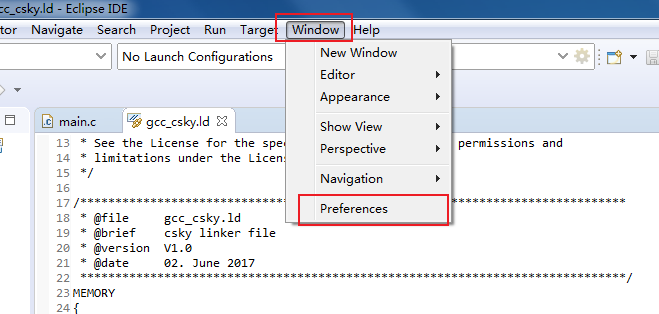
In the pop-up dialog box as shown in the figure, Click in turn, import flash Download algorithm operation
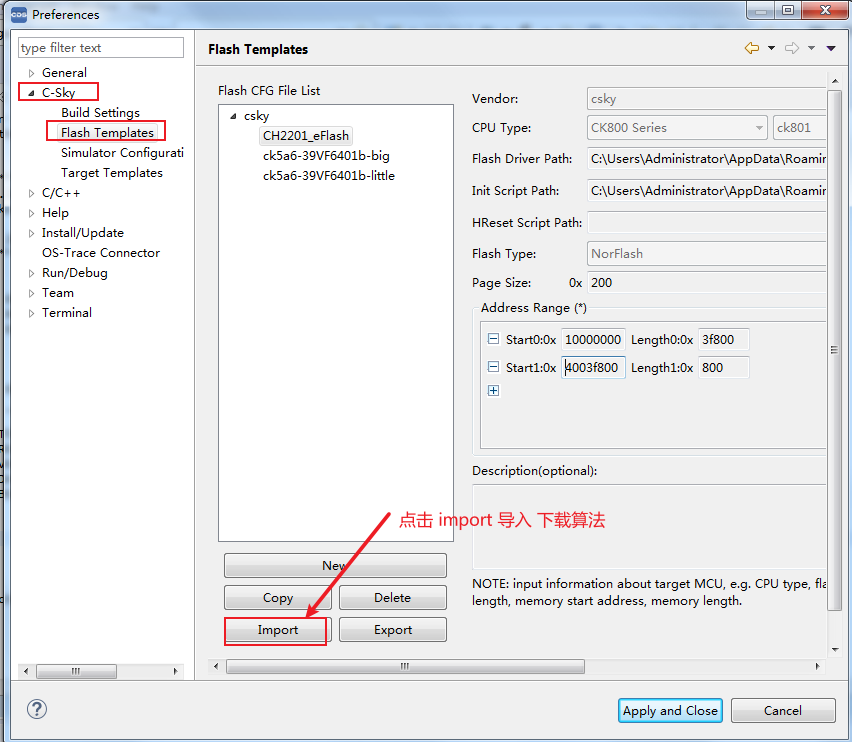
tap Import Select after option We just decompressed it flash Download the algorithm file ie W806. flash
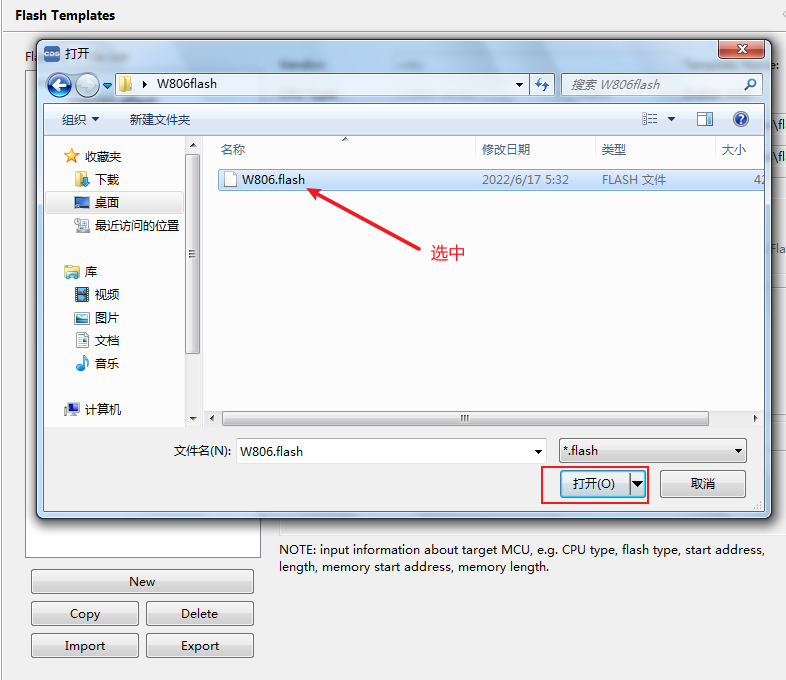
Then one pops up Modify Flash Template Dialog box, Users can modify it as required, You can also leave the default tap OK Be enough
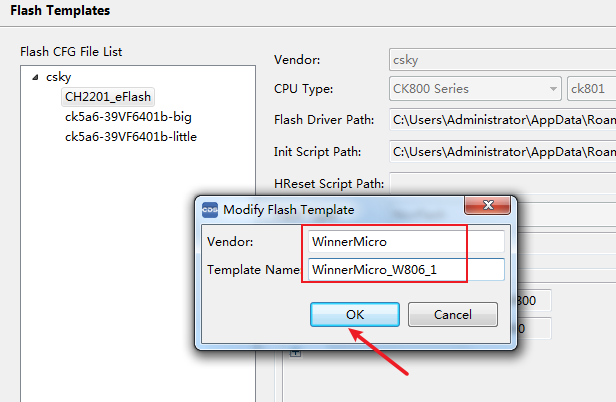
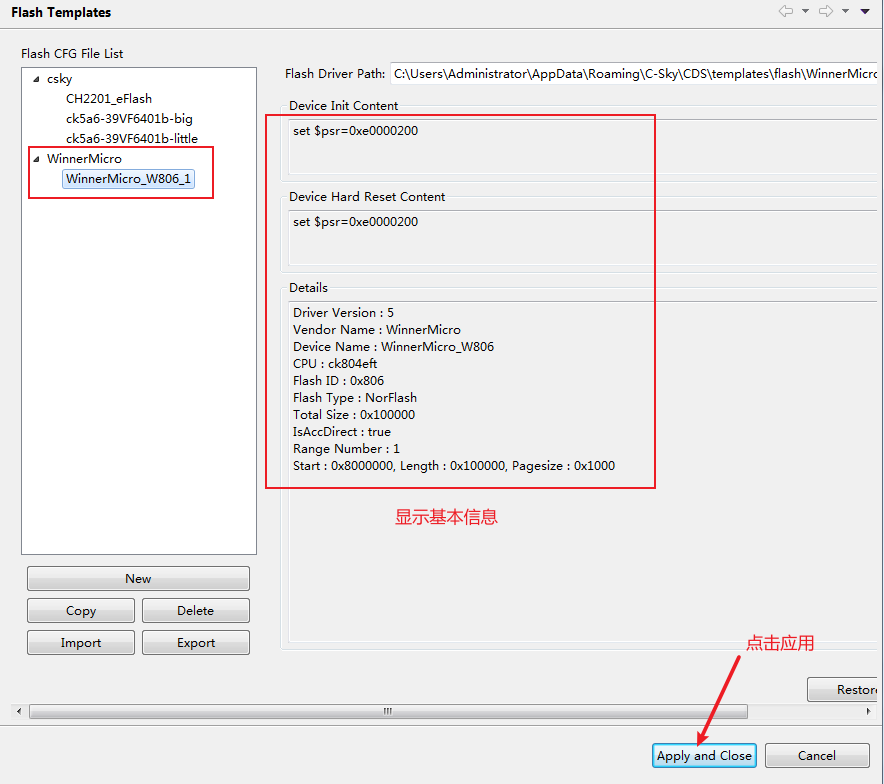
After the import is successful, it is displayed on the right Flash The version of the algorithm and basic information, tap Apply and Close Just turn off
Configure the project to use the download algorithm
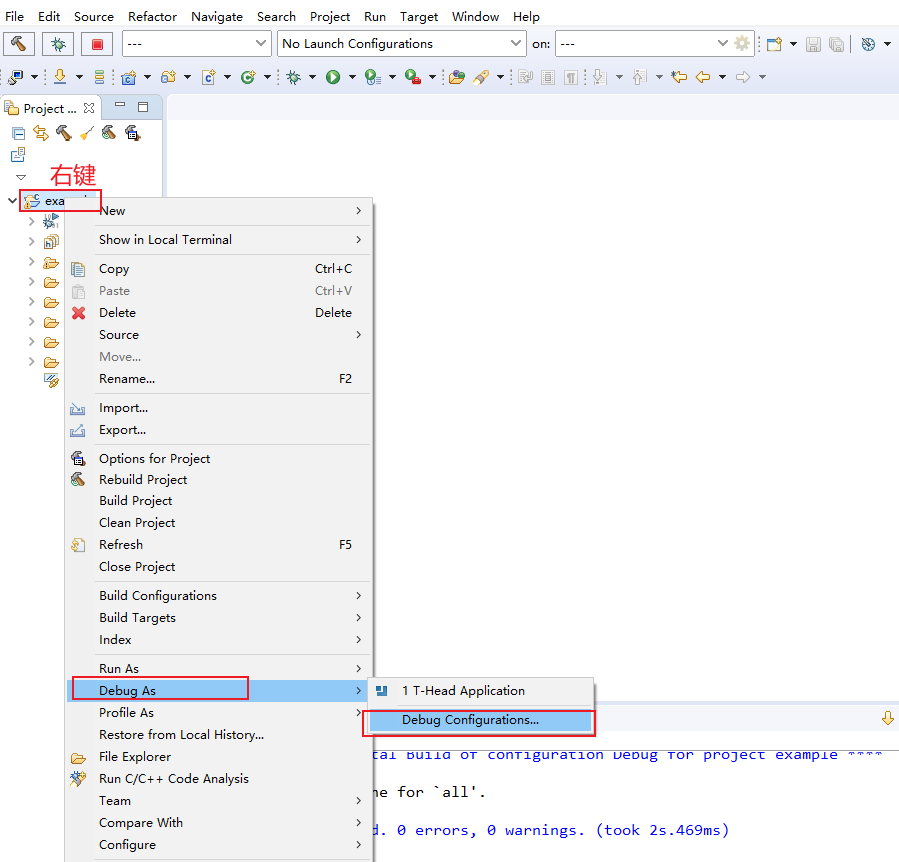
- Right-click the created project, Proceed as shown in the picture debugger Can be configured
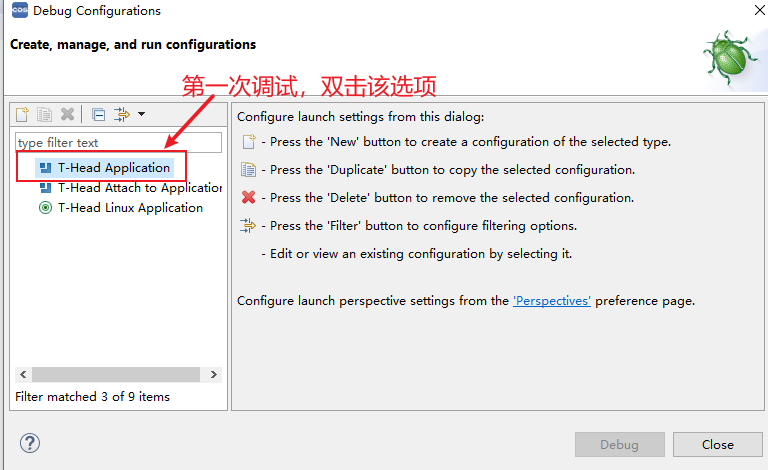
- In pop-up Debug Configuration In the TAB , double-click T-Head Application Option to open debug Parameter configuration page
- On the parameter configuration page, set the parameters as shown in the figure
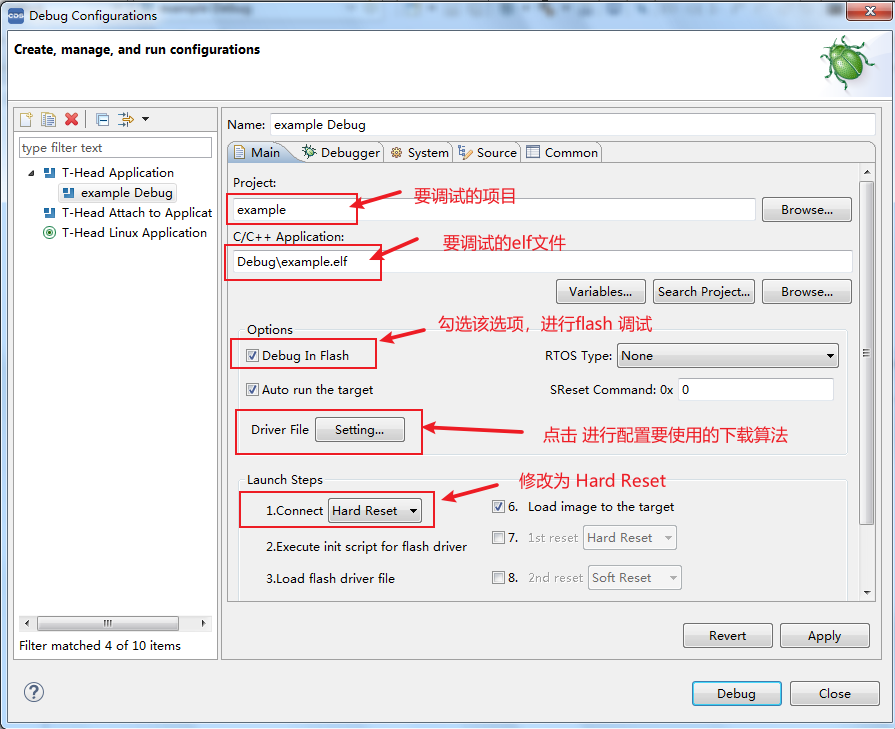
- in tap
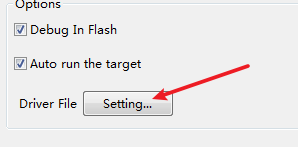 Select the download algorithm used, On the page that is displayed, configure as follows
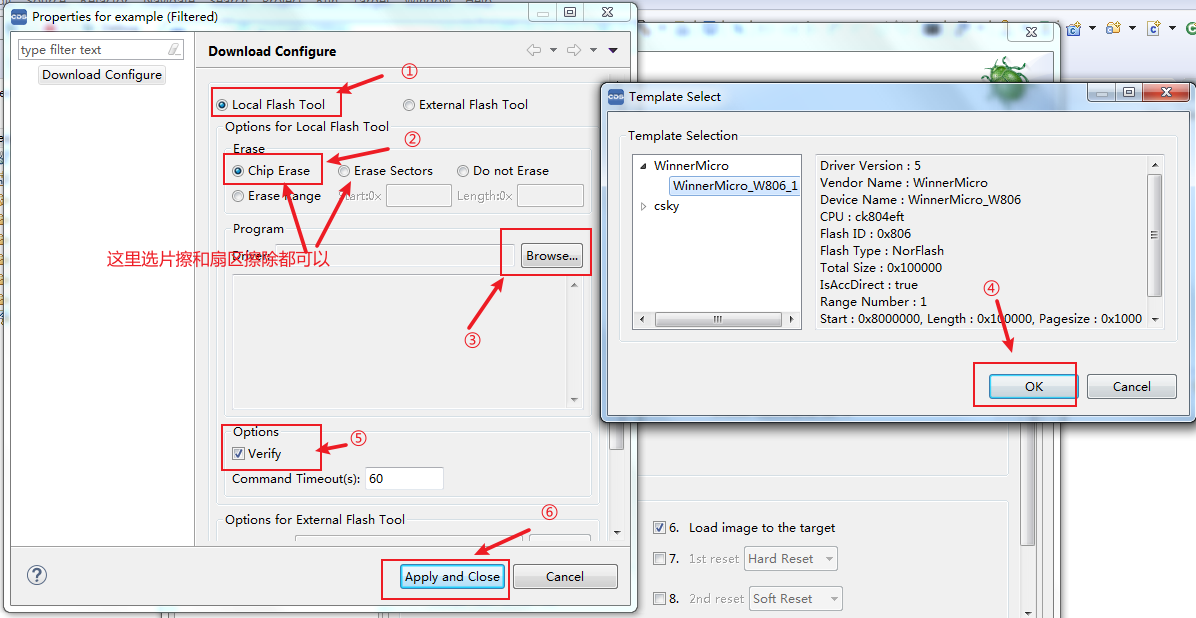
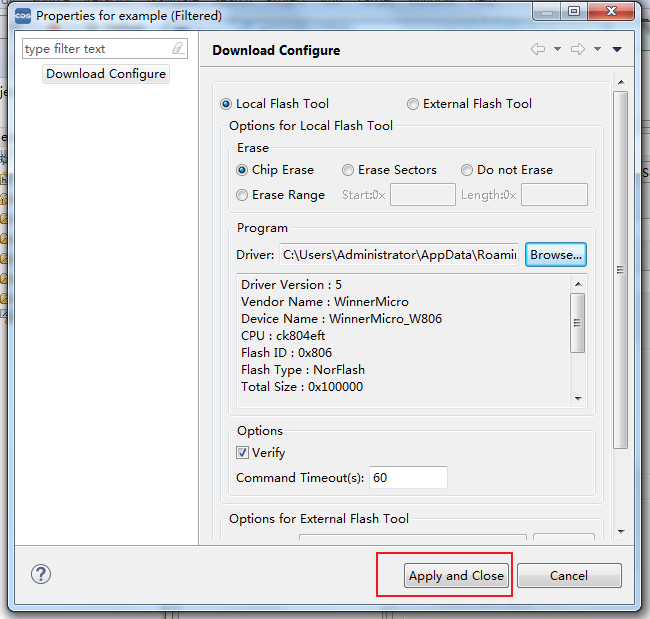
The following figure shows the configuration, tap Apply and Close Be enough
- switchable Debugger Configuration option bar, proceed Debugger disposition
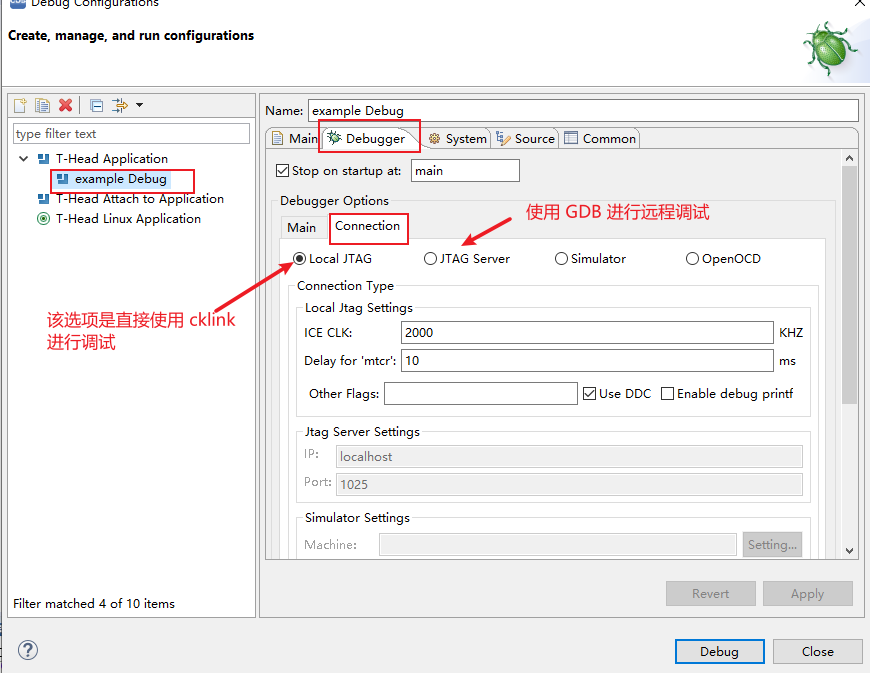
- Local JTAG This option is used directly cklink debug, No need to start separately T-Head DebugServer , The two types of debugging cannot be performed simultaneously, Use Local JTAG debug, Need to T-Head DebugServer Off.
- JTAG Server This option needs help T-Head DebugServer create socket Remote debugging, During configuration, the port number and T-Head DebugServer The created port numbers must be consistent
- Simulator This option mainly emulates CPU Nuclear use
- OpenOCD This option is for RISC -V Serial use
We debug W806 General use LocalJTAG and JTAG Server Two options, LocalJTAG Option need cklink Firmware and CDS The embedded firmware has been, Otherwise, it will be automatically upgraded, Can't stop, JTAG Server Options do not update automatically. This time we use JTAH Server Options
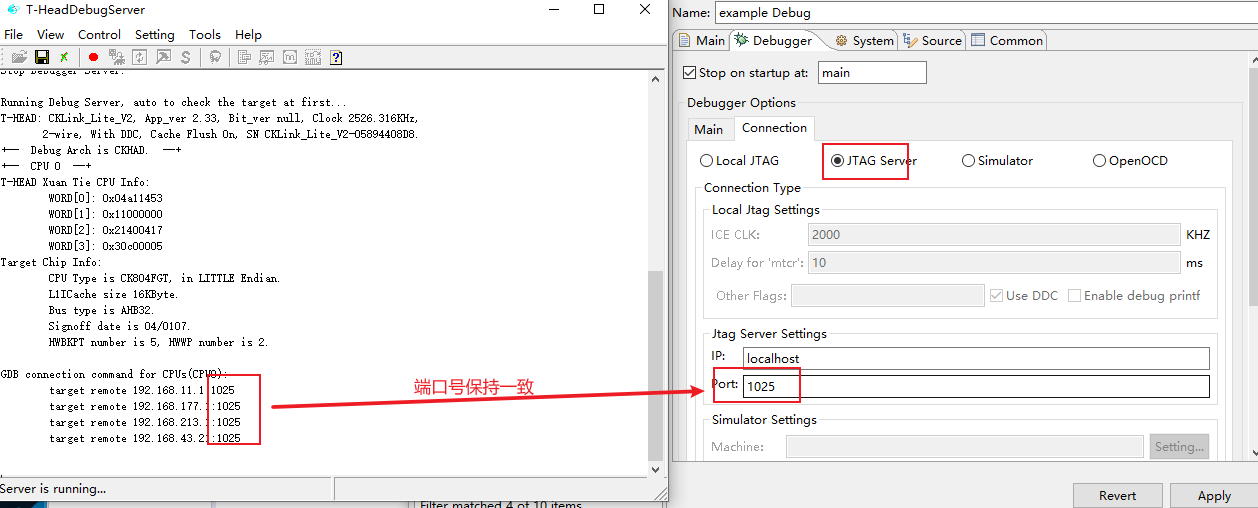
- Select after the configuration is complete Apply then Direct click Debug optional,
"img src="https: //zyqmain-1311779619. cos. ap-nanjing. myqcloud. com/img/202206170636307. png" /"
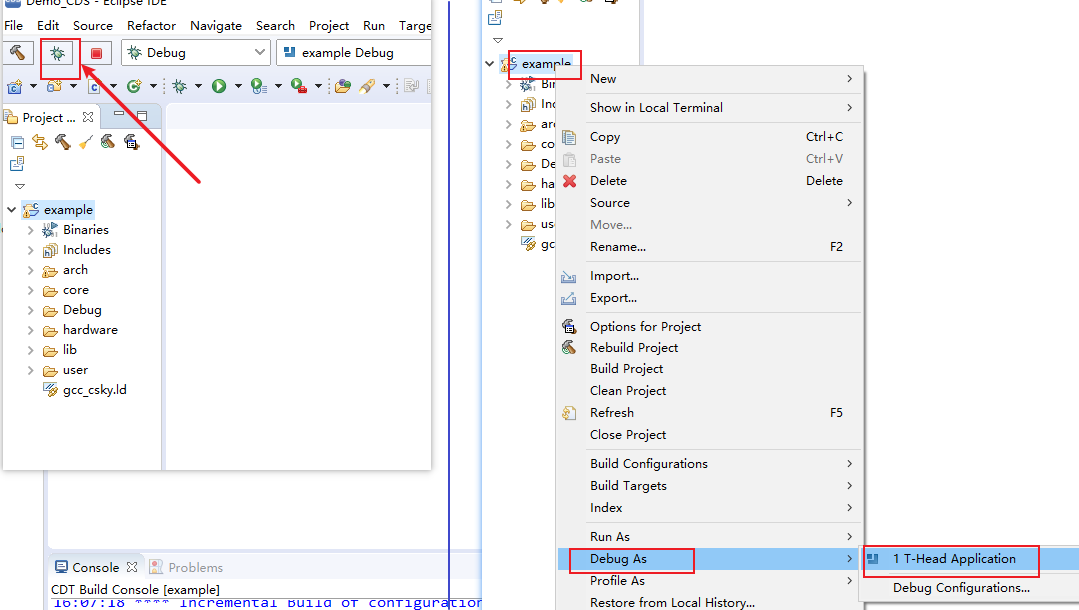
This configuration is required for the first time, Then just click IDE The small spider icon on the interface can be used, Or right click debug It is also OK
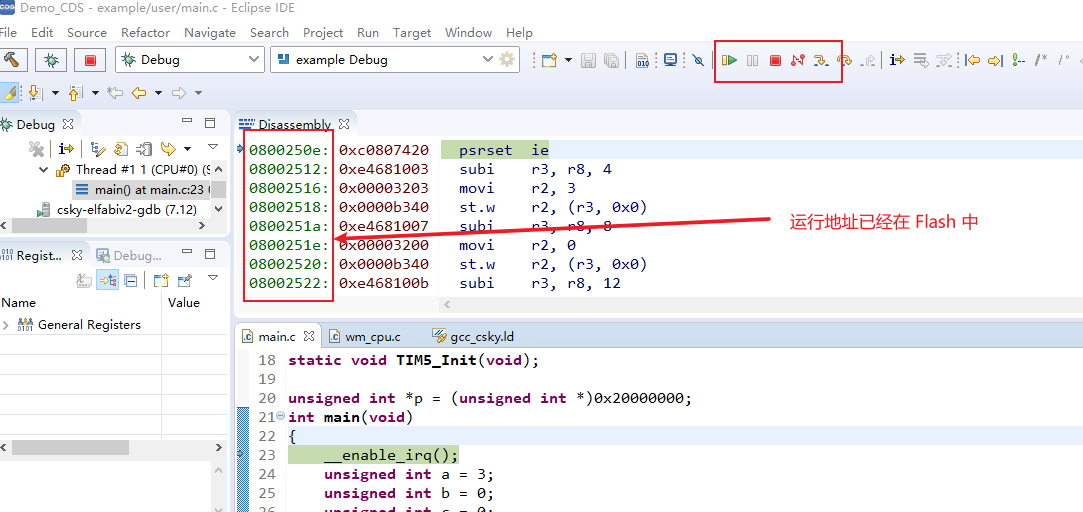
- After all configurations are normal, If the following interface is displayed, it indicates success
- if The small partner is connected to a serial port 0 If , You will see the following print
Breakpoint setting
Because this is based on Flash Debugging of, Therefore, the breakpoint type needs to be set to Hardware breakpoint Or auto breakpoint The setting method is as follows
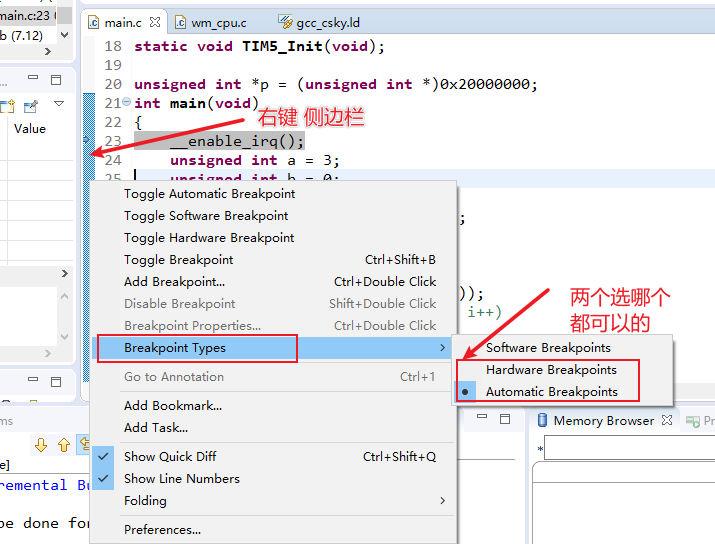
After setting, Double click the sidebar Breakpoints can be set quickly
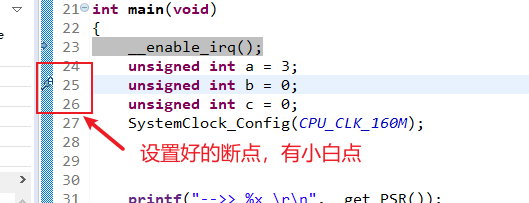
therewith Ready to proceed debug debug, disconnect debug , Press the development board Reset key , The program can run normally and automatically.
